Social Stream Ninja 
Consolidate your live social messaging streams and more
Consolidate your live social messaging streams and more
Looking for beta versions? Visit our beta downloads page
Consolidates your live social messaging streams and more
Jump to Download and Install instructions
Social Stream Ninja (SSN) makes use of VDO.Ninja's data-transport API to stream data securely between browser windows with extremely low latency and all for free!


Over a hundred sites are supported, including Youtube, Twitch, Tiktok, Facebook, Instagram, X, Kick, and Zoom.
Please see the official documentation for a list of all the supported sites and more information on using Social Stream Ninja.
Table of Contents
watch.owncast.online, or for a pop-out chat version, open https://watch.owncast.online/embed/chat/readwrite/ )[data.type = "instagramlive"][data.type = "instagram"]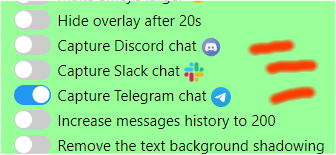 telegram, slack, whatsapp, discord require an extra step to enable. See this video for more help: https://www.youtube.com/watch?v=L3l0_8V1t0Q
Install guide for the extension: https://www.youtube.com/watch?v=Zql6Q5H2Eqw
A bit about Social Stream Ninja (old now): https://www.youtube.com/watch?v=X_11Np2JHNU
How to setup for discord, slack, whatsapp, meet, and telegram, see: https://www.youtube.com/watch?v=L3l0_8V1t0Q
This extension should work with Chromium-based browser on systems that support webRTC. This includes Chrome, Edge, and Brave. Firefox users see here.
Currently you must download, extract, and load the browser extension manually. It is not available yet in the browser's web store.
The link to download newest version is here: https://github.com/steveseguin/social_stream/archive/refs/heads/main.zip
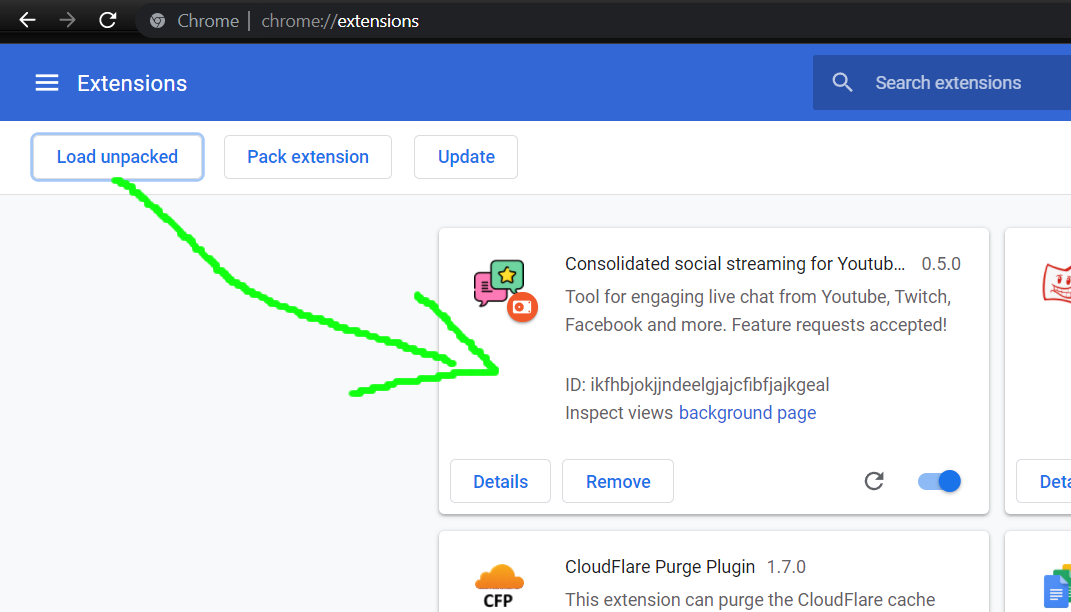
Once extracted into a folder, you can go here to load it: chrome://extensions/
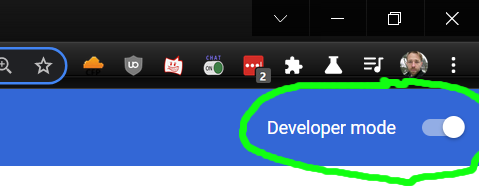
Ensure you have Developer Mode enabled; then you can just load the extension via the load unpacked button and selecting the folder you extracted the fiels to.
You're ready to start using it!
Please note also that you will need to manually update the extension to access newer versions; it currently does not auto-update aspects of the extension; just the dock and single overlay page auto-update as they are hosted online.
If you see the browser say there is an "Error", specifically a manifest v2 warning or something, you can safely ignore it. It is not actually an error and will not impact the function of the extension.
Something of concern though is Google will be updating Chrome browsers on January 2023 to block many popular Chrome extensions, including many Adblockers and also Social Stream Ninja. I'm working to resolve this concern, but Social Stream Ninja may end up having diminished functionality if Google has their way. If necessary, Social Stream may evolve into a downloadable app instead to avoid these limiations, but I'm hoping to avoid that if possible.
To update, just download the extension, replace the old files with the new files, and then reload the extension or completely restart the browser. If just reloading the extension, you may then need to also reload any open chat sites that you wish to use Social Stream Ninja with.
You can download the newest version here: https://github.com/steveseguin/social_stream/archive/refs/heads/main.zip
Please note: DO NOT Uninstall the extension if you want to update it. This will delete all your settings. Replace the files, and reload the extension or browser instead. If you MUST uninstall, you can export your settings to disk and reload them after you have reinstalled.
New app integrations do not auto-update; just the overlay and dock page will auto-update. It's suggeseted you update every now and then manually, or whenever you encounter a bug. I'll try to resolve this issue down the road, perhaps with a standalone desktop app eventually.
And for a video that covers two ways to update the extension: https://youtu.be/Zql6Q5H2Eqw?t=612
(If using the Standalone app version of SocialStream, and not the extension, it will auto update when you reload/reopen)
I no longer offer official Firefox support, but you can still try to get it going with the steps below:
Download+extract or clone the SocialStream code somewhere.
Go to about:debugging#/runtime/this-firefox in Firefox and select Load Temporary Add-on.
Select any file inside the SocialStream folder.
You're done. This is a temporary install and none of the settings made will be persist, including your session ID.
You will still need to manually redo these steps to update when needed, but you can use the newest version of the code.
There is an upcoming standalone version of Social Stream Ninja, which installs as an app, rather than as a browser extension.
To try out the preview test version of the app, you can download it below, but keep in mind that the bugs are still being worked out:
https://github.com/steveseguin/social_stream/releases/ Mac and PC are supported currently, with Linux support coming later on.
Please note: If using the same session ID in both the browser extension and the standalone version, you will only be able to use one at a time.
Open Twitch or Youtube "Pop out" chat; or just go to your Facebook Live chat while connected to Ethernet or WiFi. You must not minimize or close these windows, but they can be left in the background or moved to the side.
Then, press the Social Stream Ninja chrome extension button and ENABLE streaming of chat data. (Red implies disabled. Green is enabled)
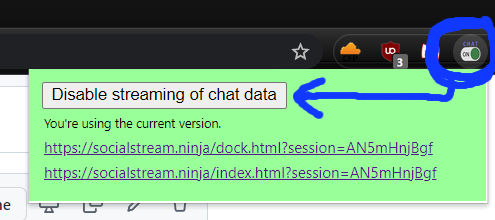
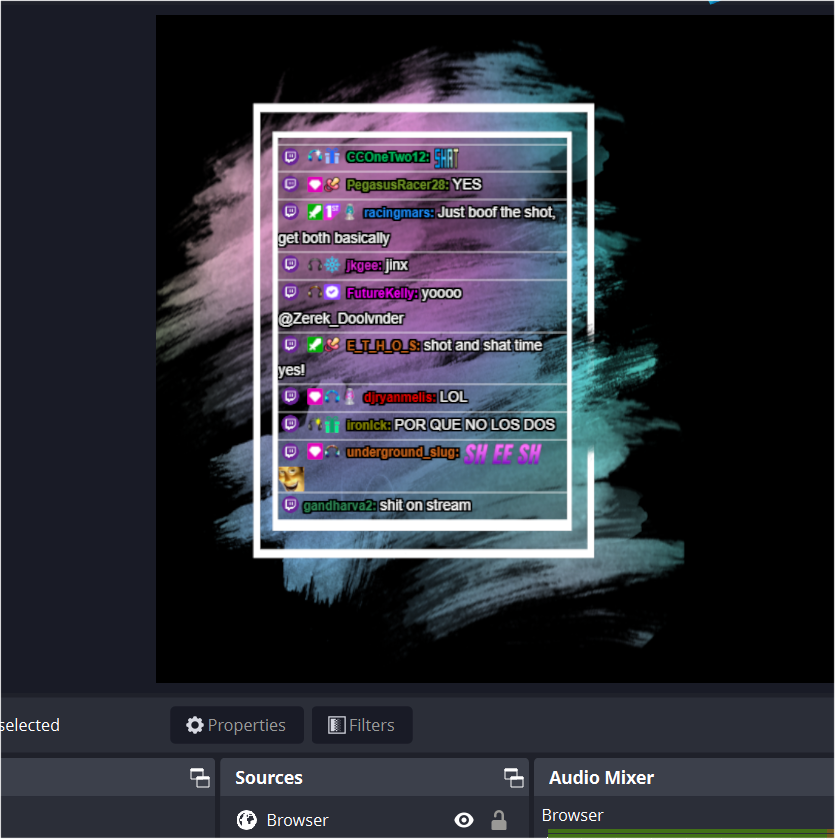
Next, using the provided two links, you can manage the Social Stream Ninja of chat messages and view selected chat messages as overlays.

You can hold ALT on the keyboard to resize elements in OBS, allowing you to crop the chat stream if you want to hide aspects like the time or source icon.
Clicking on a message will have it appear in the overlay link. You can press the clear button to hide it or use the &showtime=30000 URL option added to the overlay page to auto-hide it after 30-seconds (30,000 ms).

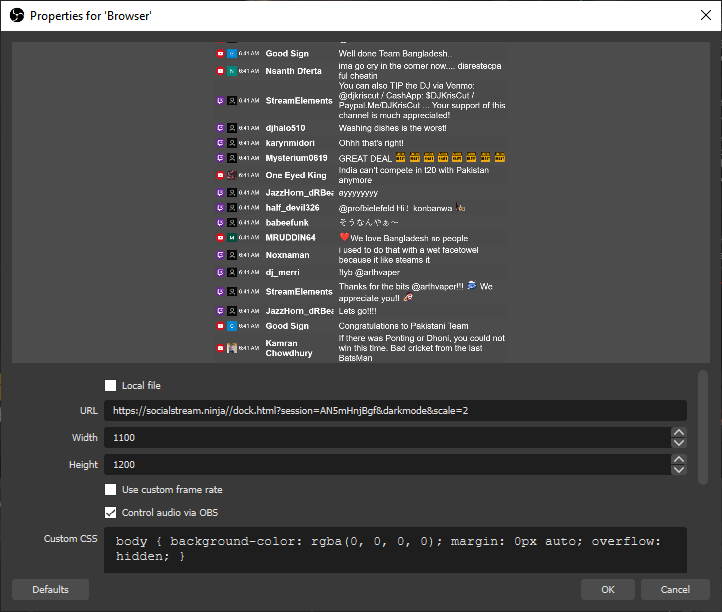
There is a &darkmode option, but the default is white, for the dock.
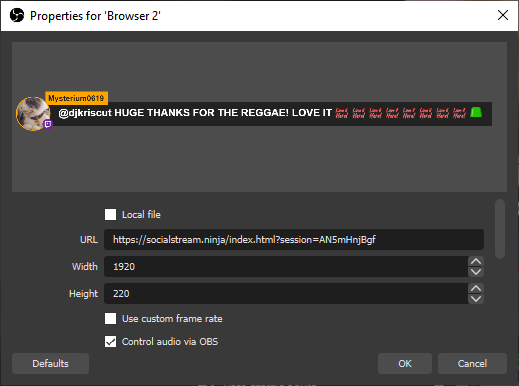
A good resolution for the overlay is either 1280x600 or 1920x600; you can specify this in the OBS browser source. You can edit the style of the overlay using the OBS CSS style input text box. The chat overlay will appear 50-px from the bottom currently, but the height of the chat window can be quite tall; to avoid the name of the overlay being cropped, just make sure you give it enough room.
If using the automated chat response options, like auto-hi, you must ensure the Youtube/Twitch/Facebook chat input options are enabled and that you are able to send a chat message. Manually entering a chat message into the pop-out window or into the Facebook live chat area first can help ensure things are working are intended, else automated message may not be sent.
There are quite a few toggles available to customize functions and styles, but these toggles often just apply URL parameters. You can as a result, just manually apply the parameters yourself, opening up more fine-grain control. A list of some of the options are available below.
To customize the dock, you can use the following options:
To customize the featured chat overlay, the following URL parameters are available
To customize the color, font-size and styling, you can edit the CSS, in either the OBS browser source style-sheet section, or by editing the and using the index.html file. See below:
To further customize the appearance of the overlay or dock, you can make CSS style changes via OBS browser source, without any coding.
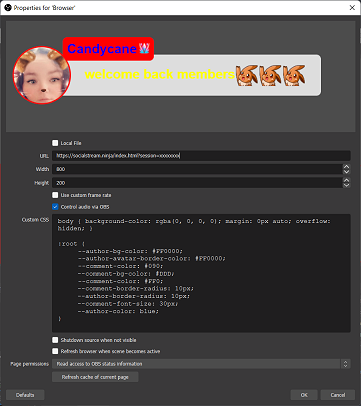
body { background-color: rgba(0, 0, 0, 0); margin: 0px auto; overflow: hidden; }

		:root {

			 --comment-color: #090;
			 --comment-bg-color: #DDD;
			 --comment-color: #FF0;
			 --comment-border-radius: 10px;
			 --comment-font-size: 30px;
			 --author-border-radius: 10px;
			 --author-bg-color: #FF0000;
			 --author-avatar-border-color: #FF0000;
			 --author-font-size: 32px;
			 --author-color: blue;
			  --font-family:  "opendyslexic", opendyslexic, serif;
		}

		@font-face {
		  font-family: 'opendyslexic';
			src: url('https://vdo.ninja/examples/OpenDyslexic-Regular.otf');
			font-style: normal;
			font-weight: normal;
		}

		.hl-name{
			padding: 2px 10px !important;
		}
Sample CSS of which you can use to customize some of the basic styles. There's not much that you can't do via CSS in this way, but you can edit things further at a code-level if needed. Mac/Linux users may face issues with OBS not liking self-hosted versions of the index/dock file, but it's not an issue for the PC version.
It's important in some cases to add !important at the end of some CSS values, to force them into use.
Try:
body {
			text-shadow: 0 0 black;
		}
In OBS browser source, for the CSS style, add the following to customize the alternative colors
:root {
			--highlight-base: #333!important;
			--highlight-base2: #888!important;
			--highlight-compact: #333!important;
			--highlight-compact2: #888!important;
		}
Note that --highlight-compact and --highlight-compact2 are needed if using &compact mode, while the other two are the default background alternative colors. Using !important is needed to force override the style.
You can also pass custom CSS to the dock and index page via URL parameters using either &css or &b64css.
&css=https://youdomain.com/style.css or &b64css=YOUR_CSS_CODE_HERE
You can use this tool to encode the URL you want to link to: https://www.urlencoder.org/
For the base64 css option, you can create the base64 encoding using btoa(encodeURIComponent(csshere)) via the browser's developer console. For example:
window.btoa(encodeURIComponent("#mainmenu{background-color: pink; ❤" ));
The above will return the base64 encoded string required. Special non-latin characters are supported with this approach; not just latin characters.
Example of what it might look like: https://socialstream.ninja/?64css=JTIzbWFpbm1lbnUlN0JiYWNrZ3JvdW5kLWNvbG9yJTNBJTIwcGluayUzQiUyMCVFMiU5RCVBNA
You can try out some stylized chat overlays in the themes folder:
An example of one is available here: https://socialstream.ninja/themes/pretty.html?session=SESSIONIDHERE
For anyone who wants to create a custom theme/style/template for their chat stream, you can share them via adding them to this repository as a Pull Request.
For those so inclined to make their own overlays for Social Stream Ninja from scratch, I've created a basic and bare HTML template for reference.
Check it out here: https://socialstream.ninja/sampleoverlay?session=XXXXX
featuredMode on or off, depending on whether you want it work with featured messages only, or all incoming messages.You can inject a bit of javascript into the dock or index pages using &js={URL ENCODED JAVASCRIPT}
For example, https://socialstream.ninja/index.html?session=test123&js=https%3A%2F%2Fvdo.ninja%2Fexamples%2Ftestjs.js
You can create your own custom auto-responding triggers or other actions by including a custom.js file. You don't need to host the index or dock file for this.
Included in the code is the custom_sample.js file, which you can rename to custom.js to get started. Included in it is the &auto1 trigger, which auto responds "1" to any message that is also "1". You need to add &auto1 to the dock's URL to activate it.
It's fairly easy to modify the auto1 trigger to do whatever you want. You can also customize or remove the URL-parameter trigger needed to activate it.
Please note that currently the custom.js file needs the dock.html to be opened locally, if you wish to have it load there.
If you hold CTRL (or cmd on mac), you can select messages in the dock that get added to a queue. A button should appear in the top dock menu bar that will let you cycle through the queue, one at a time. When pressing the Next in Queue button, messages from the queue will appear as featured chat messages in the overlay page.
Like queuing a message, you can also instead hold down the ALT key while clicking a message to pin it; it will stay at the top of the page, until unpinned in the same fashion.
These are some generic auto-reply commands that can be toggled on/off via the extension's menu. They do not need a custom.js file to work
The Standalone desktop version of Social Stream Ninja can pin windows on top of other applications, and can have the background be transparent. The Standalone app is still early in its development, so instead you might want to consider the Electron Capture app instead. It offers the ability to keep any browser window on top of your apps, such as while gaming, and there is a hotkey function to toggle user input when needing to interact with it.
check it out here: https://github.com/steveseguin/electroncapture
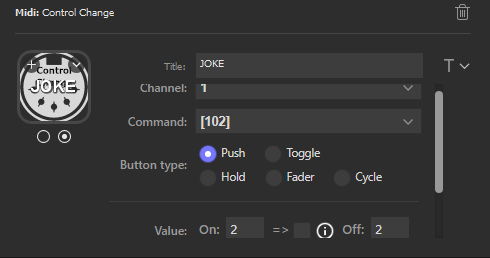
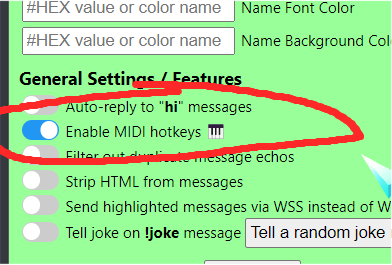
There's a toggle to enable MIDI hotkey support. This allows a user to issue commands to the extension when active, such as issue predefined chat messages to all social destinations.
The hotkeys can be issued via MIDI, which can be applied to a Streamdeck also via a virtual MIDI device. The MIDI actions available currently include:
Using Control Change MIDI Commands, on channel 1:
The StreamDeck MIDI plugin can be found in the Streamdeck store pretty easily.
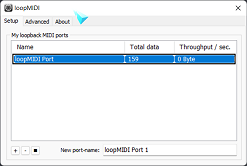
Please note that you will also need a MIDI Loopback device installed if using the StreamDeck MIDI plugin. For Windows, you can find a virtual MIDI loopback device here: https://www.tobias-erichsen.de/software/loopmidi.html There are some for macOS as well.
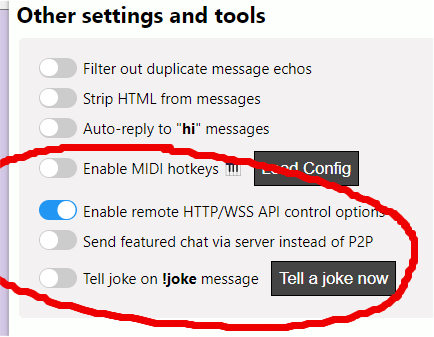
Lastly, please note that you will need to enable the MIDI option in the menu options for it to work, as it is not loaded by default.
You can send messages to Social Stream Ninja via the hosted server ingest API, and you can also send messages from Social Stream Ninja to remote third-parties. Many options are supported; perhaps more than what is listed below.
A simple use case is to ingest a donation from a third party via webhook. You can push those dono notifications to Social Stream Ninja and show as an overlay. You can also use a third-party service to overlay messages captured by Social Stream Ninja. More below.
If using the MIDI API isn't something you can use, you can also check out the hosted API service to send messages to SocialStream, which will be redirected to your social live chat sites. This API works with a Stream Deck or custom applications.
This API end point supports WSS, HTTPS GET, and HTTP POST (JSON). Support for this API must be toggled on in the menu settings; there's several different toggles you may want to enable, depending on which HTTP/WSS API you want to use
An overly simple example of how to use the GET API would be: https://io.socialstream.ninja/XXXXXXXXXX/sendChat/null/Hello, which sends HELLO. Replace XXXXX with your Social Stream Ninja session ID. Other options, like https://io.socialstream.ninja/XXXXXXXXXX/clearOverlay should work, too.
You can use this API to clear the featured-chat, poke the next-in-queue item, and more. It works with WSS or HTTP requests.
You can also target specific docks with your API requests by assigning a target name to each dock.html page using &label.
For example, to set a dock with the target name of "NAMEHERE", we'd do: https://socialstream.ninja/dock.html?session=XXXXXXXXXXXXX&server&sync&label=NAMEHERE. From there, we can target it with the API format like this: https://io.socialstream.ninja/XXXXXXXXXXXXX/nextInQueue/NAMEHERE/null. This all may be needed because if you have multiple docks connected to the API interface, you may not want to trigger the same command multiple times in all cases.
For details of the commands, see the following link for sample functionality and refer to its source code for examples.
https://socialstream.ninja/sampleapi.html?session=xxxxxxxxxx (replacing xxxxxxxx with your Social Stream Ninja session ID to have it work)
More functionality can be added on request.
Remote API support is available via dock page or extensions. You can currently auto-publish messages via the dock with the &autoshow parameter, but there's also an option to publish to the featured chat via the dock directly. To capture these messages, you can use the websocket API server, which requires enabling a toggle in the General mechanics section. You can also publish messages via POST/PUT to an HTTP webserver, rather than connecting with websockets; there's a few options for singular / h2r specifically.
For some images provided in the outgoing data-structure, the assumed host location for certain files/images, if none provided, should be https://socialstream.ninja/.
If wanting to connect to the websocket server, to publish or listen to messages, you can refer to the code for actual examples. However, a simple way to listen for messages broadcasted by the extension is with wss://io.socialstream.ninja/join/SESSIONIDHERE/4, which implies joining the room with our session ID as the name, and then subscribing to channel 4 for messages. wss://io.socialstream.ninja/join/SESSIONIDHERE/1/2 on the other hand would listen on channel 1, and publish to channel 2.
&singular=XXXXXXX will send selected messages (via the dock page) to singular live for featured message overlay. The target address will be: https://app.singular.live/apiv1/datanodes/XXXXXXX/data
This parameter is added to the dock page to use.
&h2r=XXXXXXX will send selected messages (via the dock page) to a local H2R server using its POST data structure. The target address will be: "http://127.0.0.1:4001/data/XXXXXXX
You can manually set a custom H2R URL though with &h2rurl though, which will override the default one.
These parameters are added to the dock page to use.
These options will send selected featured messages (via the Dock page) to a remote web server; the default URL is "http://127.0.0.1"
A generic JSON-POST can be made using &postserver, with the address provided
&postserver=https://domain.com/input-source
A generic JSON-PUT can be made using &putserver, with the address provided. There isn't much difference between POST and PUT, but some sites are picky.
&putserver=https://domain.com/input-source
In these cases, the JSON being delivered is in the Social Stream Ninja data-structure. Example usage is as follows:
https://socialstream.ninja/dock?session=XXXXXX&postserver=https://127.0.0.1/messageingest/?socialstream
If you create a Stripe payment link (eg: https://donate.stripe.com/YYYYYYYYYYYY), you can have successful payments show up in Social Stream Ninja. This is a great way to collect donations from viewers of your stream without needing to use middleware for payment processing.
To get started, after creating a Stripe payment link, create a Stripe webhook that listens for the event checkout.session.completed. Have the webhook point to: https://io.socialstream.ninja/XXXXXX/stripe, where XXXXXX is your Social Stream Ninja session ID. You don't need to worry about the verification signatures or API tokens in Stripe since we won't be verifying the payments. Of course, keep your session ID private as a result, else someone will be able to spoof fake donations to your end point.
If you wish to ask the payer for a name, include a custom field called "Display Name" or "Username" when creating your Stripe payment link. You can also include a field called "Message", which will allow the payer an opportunity to leave a custom message. The donation amount and current type should be dervived from the payment automatically, but some rare exotic currencies may not always show up with the right decimal place -- just keep that in mind.
Lastly, to allow these events to show up in the Social Stream Ninja dock, add &server to the dock URL; this will have the dock start listening for incoming messages from the webhook/api server. You can always test that the workflow is working using Stripe's "Test mode"; just spam 424242.. etc for the credit card number, expiration, cvc, etc, when using the test mode, rather than a valid credit card.
This is very simliar to the Stripe support method, as seen above.
To setup, sign into your Ko-Fi account, go to https://ko-fi.com/manage/webhooks
Add https://io.socialstream.ninja/XXXXXXXX/kofi to the Webhook URL text field, where you replace XXXXXXXX with your Social Stream Ninja session ID.
On your dock.html page, append &server to the URL (at the end is fine). This has the dock connecting to the Social Stream Ninja API service, which is where our Ko-Fi notifications will come from.
You can then press the Send Single Donation Test button.
Please note, do not share your Social Stream Ninja session ID with others as they will be able to create fake donations to Social Stream Ninja via posting to the API.
Text messages can be converted to speech for free, assuming your system supports TTS. On my Windows machine running Chrome/Edge/OBS, it works just fine. I have it set to English-US by default, but you can change the language to something else by editing the URL and adjusting the language code.
ie: index.html?session=XXXXXX&speech=en-US or socialstream.ninja/?session=xxx&&speech=en-US
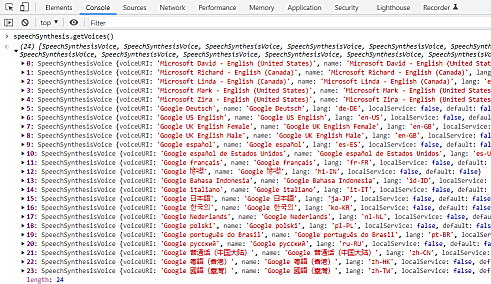
Please visit https://socialstream.ninja/tts for a list of available speech options for your specific browser + system. Google Chrome and MS Edge will offer both local and cloud-hosted language options, while "free" open-source browsers, like Chromium or Firefox may only have access to local system languages or none at all. Local options should work within the OBS browser source, such as the ones shown in the image below, but non-local free options will need to be used via Chrome or Edge.
You can sometimes install additional local languages if on Windows. See: https://support.microsoft.com/en-us/windows/download-language-pack-for-speech-24d06ef3-ca09-ddcc-70a0-63606fd16394
Please note that when using this free TTS approach, the audio will play out the default system audio output device. This might be a problem if using OBS for capture, as you'll need to use a virtual audio cable to capture the audio output of the system output and route it back into OBS for capture. Another user mentioned they were able to capture the TTS audio in OBS by selecting explorer.exe in the system application recorder.
If it's too complicated to use the built-in free TTS, using the premium Google Cloud / ElevenLabs TTS option (mentioned below) would be a great non-free solution to this issue. The paid options play out as browser tab audio, not system audio. See the related issue here: https://github.com/w3c/mediacapture-output/issues/102
If loading the app in the Chrome/Edge/Firefox browser, you will need to "click" the web page first before audio will play. This isn't the case with OBS, but most browsers require the user interact with the website on some level before it will play audio. Please keep this in mind when testing things.
There is a toggle in the dock to turn off and on the text-to-speech; turning it off whill automatically stop any audio playout. Still, be careful when using text-to-speech with the dock, as viewers can exploit it to have your system read out unwanted things on air.
By default, the list of support languages on your computer could be slim. To add more speech options for different langauges, you'll need to install them.
see: https://support.microsoft.com/en-us/windows/download-language-pack-for-speech-24d06ef3-ca09-ddcc-70a0-63606fd16394 for details
There's a simplified test app for text-to-speech here also, that might also help try different languages on the fly: https://mdn.github.io/dom-examples/web-speech-api/speak-easy-synthesis/
You can manaul set the pitch, volume, rate, and even voice-name with the below URL parameters. The voice just matches on a partial word, so "siri", "google", "bob", or whatever is being used will work. This still assumes the language selected also matches. &speech=en (first english to match), &speech=en-US (default), or &speech=fr-CA can specify the language, for example.
&pitch=1
		&volume=1
		&voice=google
		&rate=1
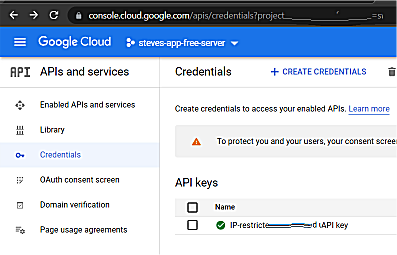
I've added support for Google Cloud Text to Speech API, but you must use your own API key to use this feature, as it is expensive to use.
Go to https://cloud.google.com/text-to-speech -> Enable the service, and then get an API key.
This premium text-to-speech is supported on the index.html (the featured chat overlay) and dock.html page. If you stop the TTS with the button in the dock's menu, it will stop playback immediately in the dock. It will also delete any queued messages to be spoken.
You need at least &speech and &ttskey to enable the premium TTS, but there are customizations:
&volume=1
		&voice=en-GB-Standard-A
		&gender=FEMALE
		&speech=en-us
		&ttskey=XXXXXXX
See the Google Cloud doc for more help
If you want a different set of voices, or wish to train your own, ElevenLabs.io has a TTS service that you can try. There's a "free" version you can get started testing with, which just needs you to create an account there and get an API key from your profile settings there. You may need to provide attribution as required, for the free tier?
Anyways, documentation on getting start with finding a voice you want to use and testing your API key: API Social Stream Ninja is using: https://api.elevenlabs.io/docs#/text-to-speech/Text_to_speech_v1_text_to_speech__voice_id__stream_post Available voices: https://api.elevenlabs.io/docs#/voices/Get_voices_v1_voices_get
To use this with Social Stream Ninja, you'll need to be using the featured-chat index.html or dock.html page, and you'll need to provide your api key there.
Example URL with options https://socialstream.ninja/index.html?session=SESSIONIDHERE&tts&elevenlabskey=YOURELEVENLABSAPIKEYHERE&latency=4&voice=VR6AewLTigWG4xSOukaG
If you stop the TTS with the button in the dock's menu, it will stop playback immediately in the dock. It will also delete any queued messages to be spoken.
Please NOTE: Make sure to CLICK on the browser page after it loads, else audio may not work in the browser. Browsers require user-gesture detection before audio can auto-play. OBS Studio's browser source and the Electron Capture app are exceptions to this rule.
There is a toggle that lets you show the source of the chat messages.
You can exclude certain sources from appearing in the dock with the &exclude option
You can combine multiple docks into one, if for example you have multiple extensions capturing chat, and want to view it all one a single computer
You can filter out certain messages marked as "events" in the dock using &filterevents
the Filter option in the dock supports ! to denote opposite, such as source:!youtube, so only filter for sources that are not youtube.
Browser may pause non-visible windows, such as the chat streams Social Stream Ninja grabs from, and so you may need to disable this behaviour in your browser. To do so, "Disable" the option located at chrome://flags/#enable-throttle-display-none-and-visibility-hidden-cross-origin-iframes. Also "Disable" the flag chrome://flags/#calculate-native-win-occlusion. Restart the browser after saving the changes.
Avoid minimizing any windows. Things work best if windows are kept visible and open, but if you need to put them in the background, don't minimize them at least.
Browsers may also sometimes stop tabs/windows after an hour of inactivity. Disable any option in your browser under chrome://settings/performance related to performance throttling or background tabs, such as "Throttle Javascript timers in background".
Try to keep the chat window and dock page active and if possible, even partially visible on screen. If the windows are hidden or minimized, they may stop working. This is also true if the scroll bar for the chat window is not at the bottom; sometimes messages won't load unless you are seeing the newest messages.
Another option, if chat messages stop once put in them in background, if using Windows, is to do Win + Tab, and have two virtual Desktops on your PC. Put the chat windows into one virtual desktop, and use OBS in the other. Win+Tab can let you switch between desktops/windows.
You can also try the Social Stream Ninja Standalone desktop app, as that has more controls and will avoid common throttling / visibility issues found while using Chrome
You can also download an application that can "pin" the chat windows, so they remain on top and visible. The windows can be made very small in those cases, and just push to the side.
If the auto responder doesn't work -- you see a blue bar, but nothing happens, there's a couple things to do.
chrome://apps and remove the Youtube(s) apps that might appear. You can remove them all really if none are required.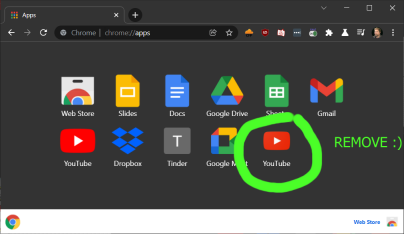
--silent-debugger-extension-api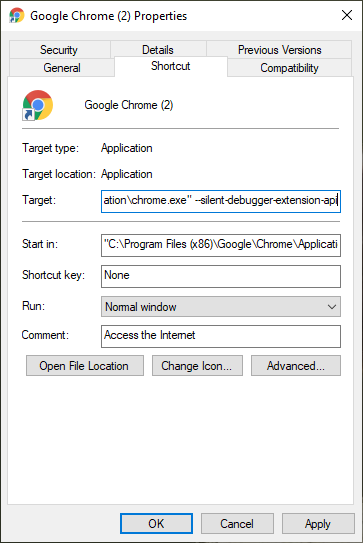
File System Access APIIn Brave, this can be enabled via brave://flags/#file-system-access-api ; open that link and enable the setting (then restart)
If using OBS Studio on macOS or Linux, for some reason this extension will not work if hosted locally on your drive, so custom CSS needs to happen via the browser source style section. It works great on PC locally, and when hosted on socialstream.ninja, but locally on mac, it does not seem supported. This is an issue you'll need to take up with the OBS developers.
For discord, slack, and telegram not working, for security reasons, you need to enable the TOGGLE switch in the settings to enable.
Make sure your session ID matches the dock.html page and the value inside the extension; if they don't match, things work work
To set the Session ID to your own value, go to Extensions settings to set it. On Chrome: Settings -> Extensions -> Social Stream Ninja -> Details -> Extension options.
Try refreshing the chat page if things stop working; sometimes refreshing the page will retrigger the code and bypass any errors. This is particularly try if you install or refresh the extension after the chat page has already been loaded.
You can make a request here on Github as an issue ticket, or join the Discord server at https://discord.socialstream.ninja and request there.
Not all requested sites can or will be supported. Steve generally will add support for publicly accessible social chat sites that have a significantly-large community; it's ultimately up to the decretion of Steve though on what he wants to add or has time to add. Code contributions from others that add new site integration or features are normally welcomed, but sites/features that may violate Canadian laws, fail to meet quality standards, or for any other reason, may possibly not be merged or accepted. In these cases you may need to self-host or fork the repo, maintaining your own copy with said changes instead.
There is no guarentee that a site that gets added will continue to be supported over time. Steve also doesn't accept payment for adding an integration or for support.
I have a video walk-thru on how I added a simple social site to Social Stream Ninja: https://www.youtube.com/watch?v=5LquQ1xhmms
You can also refer to some of my code commits, where you can see which changes I made to add support for any specific site.
ie: https://github.com/steveseguin/social_stream/commit/942fce2697d5f9d51af6da61fc878824dee514b4
For a simple site, a developer should need just 30 minutes to an hour to get a site supported. A more complicated and tricky site may take a few hours or longer, depending on the developer's skill.
You can find me on discord over at https://discord.socialstream.ninja or https://discord.gg/7U4ERn9y, offering free support in channel #chat.overlay-support
Feedback and feature requests are welcomed. Please also make a Github issue if you're not a fan of Discord, but still need to report a bug or feature request.
I condemn Russia's brutal invasion of Ukraine. 💙💛 Please consider supporting or donating to Ukraine instead: https://war.ukraine.ua/support-ukraine/
I do not claim rights of all the icons distributed. While I made some of the icons, trademarks and logos of third party companies/services are the rights of those respectivitive entities. Use them according to the terms that those entities may offer them under.
Some icons used are licensced as attribution-required: Communication icons created by Freepik - Flaticon
This project contains inspiration by my other project, chat.io.socialstream.ninja, which was a derivation of another Youtube-specific chat widget, which was inspired by the stylings of other featured-chat code sample, of which that was also inspired by existing chat overlay designs. May the many new innovations of this project inspire the future foundation of other awesome projects as well.