
Let OBS do the first setup
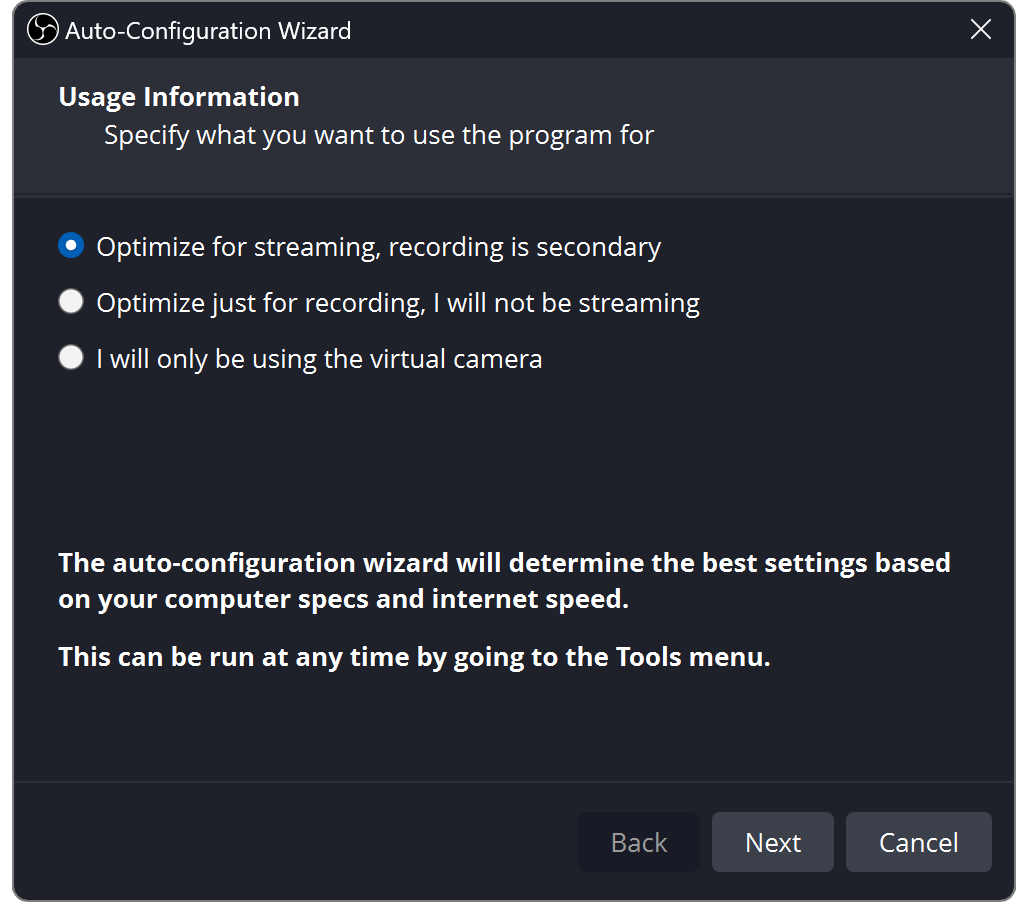
- Install OBS Studio and open it.
- Choose Tools → Auto-Configuration Wizard.
- Select streaming or recording, follow the prompts, and apply the settings.
Allow camera, microphone, and screen capture access when your computer asks.
Screenshots open at full size when selected. Labels may vary slightly by OBS version.
Build one scene
A scene is a layout. A source is something inside it.
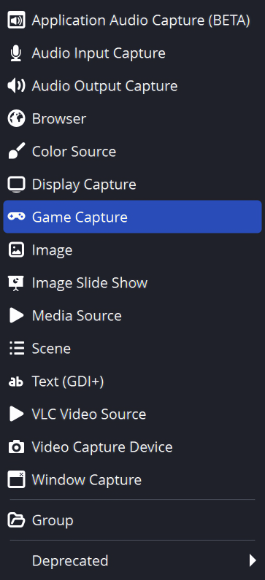
Press + in Scenes, name your layout, then press + in Sources.
- Camera / capture card
- Video Capture Device
- Game on Windows
- Game Capture
- App / whole monitor
- Window / Display Capture
- Chat or alerts
- Browser
Drag corners to resize. Sources at the top cover those below. Use the eye to hide and the lock to prevent movement.
Scene switching and macOS
On macOS, use macOS Screen Capture for a window or display.
Scene changes normally go straight to output. Studio Mode lets you prepare a scene, then press Transition. Shared source and audio changes can still affect the live output.
Choose Add Existing to reuse a source in another scene.
Choose your video size
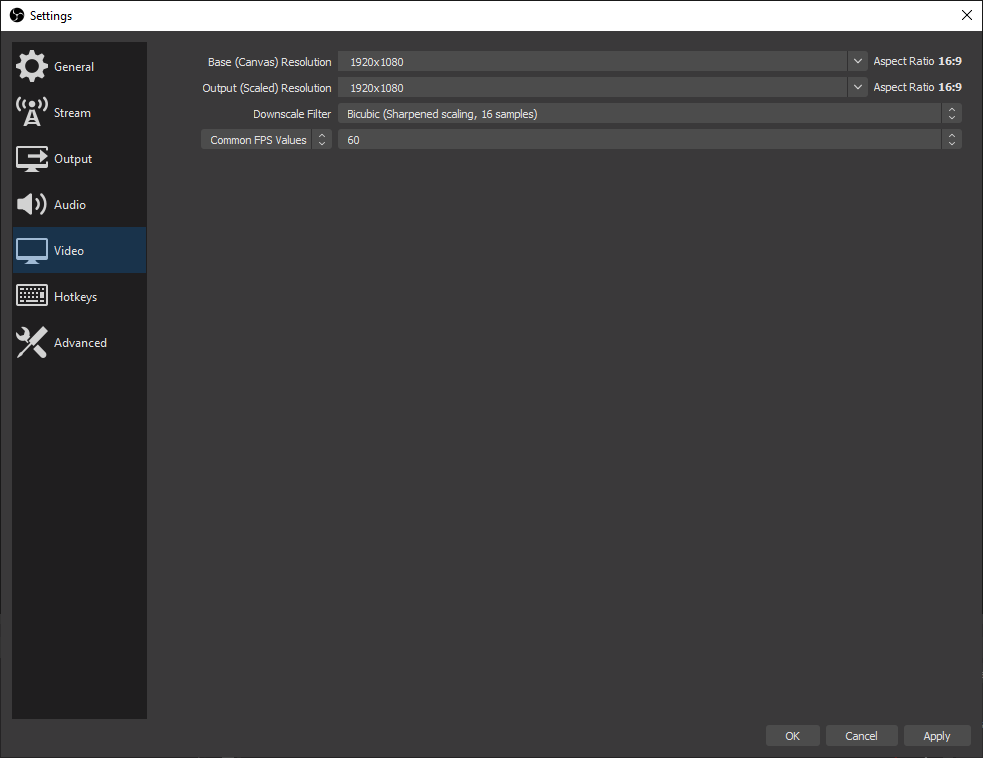
Open Settings → Video.
- Canvas
- Your layout’s size
- Output
- The video you send
- 30 FPS
- Talking / lighter workload
- 60 FPS
- Smoother fast motion
A simple start: 1920 × 1080 canvas, 1280 × 720 output, 30 FPS.
For portrait video, use a 1080 × 1920 canvas and rearrange your sources to fit.
Give your CPU a break
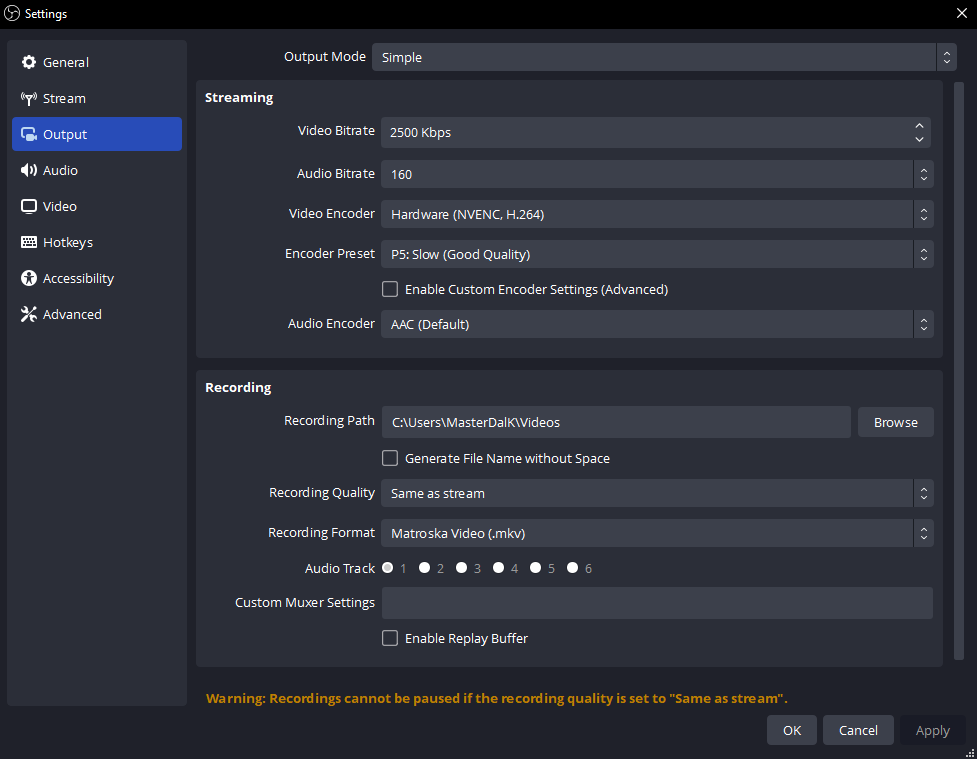
In Settings → Output, choose a hardware H.264 encoder. Dedicated hardware handles video compression, reducing CPU use.
- NVIDIA
- NVENC H.264
- AMD
- AMD HW H.264 / AVC
- Intel
- QuickSync / QSV H.264
- Apple Silicon
- Apple VT H264 Hardware
No hardware option? Use x264 → veryfast and start at 720p30.
Missing encoder or overloaded computer?
Check hardware support and update your graphics driver. OBS still needs GPU capacity to draw scenes; cap game FPS or lower output FPS if it falls behind.
If your Mac’s hardware encoder cannot provide CBR, use x264. Encoder compatibility.
Connect your platform
Settings → Stream: connect your account, or paste the server URL and private stream key from its dashboard.
For manual output settings, choose Output → Advanced → Streaming: CBR, 2-second keyframes, and AAC stereo. Open your platform below.
TwitchStandard H.264
| Video | Bitrate |
|---|---|
| 720p30 | 3,000 |
| 720p60 / 1080p30 | 4,500 |
| 1080p60 | 6,000 |
Audio: up to 160 kbps. Twitch settings.
Enhanced Broadcasting sends multiple qualities and needs a separate bandwidth budget.
YouTubeH.264 recommended targets
| Video | Bitrate |
|---|---|
| 720p30 / 60 | 8,000 |
| 1080p30 | 14,000 |
| 1080p60 | 17,000 |
Audio: 128 kbps, 44.1 kHz stereo. These are recommendations, not minimums. YouTube settings.
With supported AV1 / HEVC encoding, the corresponding targets are 6,000 / 10,000 / 12,000 kbps.
KickH.264 · CBR required
| Video | Bitrate |
|---|---|
| Try 720p30 | 3,000–4,000 |
| Up to 1080p60 | 8,000 max. |
The lower range is a suggested starting test. Try 160 kbps audio; use stereo at no more than 48 kHz. Kick settings.
Leave upload headroom. 6,000 kbps uses about 6 Mbps, plus audio and overhead. Lower bitrate or resolution if your connection cannot keep up.
October 2026 guidance. Follow your platform’s current requirements. For Facebook or TikTok, first confirm your account offers an external encoder connection.
Make your voice easy to hear
- Choose your microphone in Settings → Audio.
- Speak normally. Aim for peaks around −12 to −6 dBFS; avoid hitting 0.
- Lower game, music, and alert sliders until speech is clear.
Capture each sound once. Use Desktop Audio for the whole output device, or separate application capture. Capturing both can double the sound.
App audio, macOS, and microphone filters
Windows: use Application Audio Capture. On macOS 13+, use OBS’s macOS audio/screen capture.
Microphone → Filters: try light noise suppression, then a compressor and limiter. Add one at a time and listen.
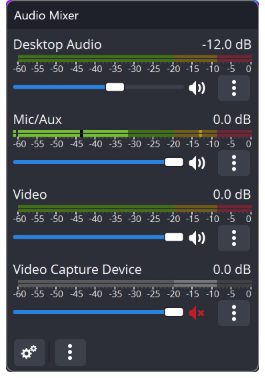
Choose what you hear
Choose headphones in Settings → Audio → Advanced → Monitoring Device. Then open the mixer’s Advanced Audio Properties.
Monitor Off
Headphones No
Stream Yes
Usually right for your mic and games you already hear.
Monitor Only (mute output)
Headphones Yes
Stream No
Listen without sending the source directly to output.
Monitor and Output
Headphones Yes
Stream Yes
Useful for alerts or TTS you want to hear too.
Assumes the source is unmuted and on your output track. “Monitor Off” does not mute the stream.
Avoid echo: don’t capture your monitoring device again through Desktop Audio. That can also send “Monitor Only” audio to viewers. Keep the platform’s live player muted.
Add a chat or alert overlay
- Copy the overlay URL from Social Stream Ninja.
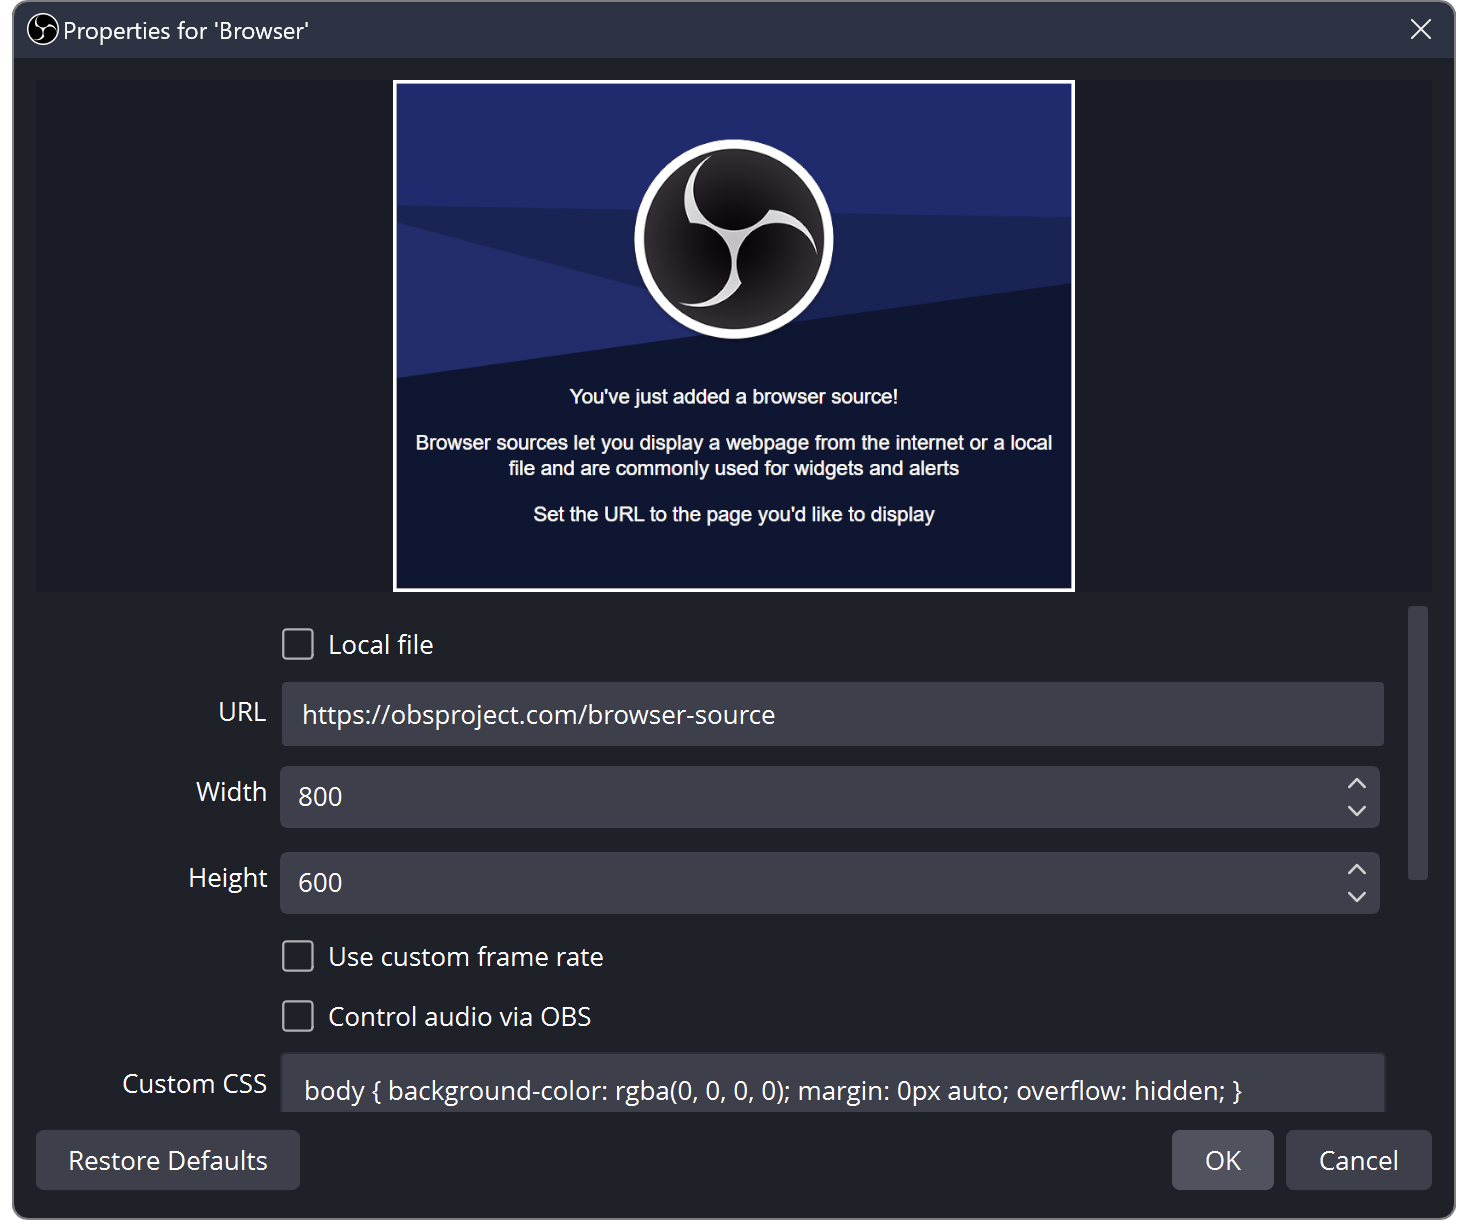
- Choose Sources → + → Browser and paste it. Keep its session and password options.
- Set the overlay size; use 1920 × 1080 for a full-frame landscape overlay.
- For TTS or alerts, enable Control audio via OBS.
Place it above your game or camera. Send a test message; select one in the SSN dock if using the featured-message overlay.
Blank overlay or repeated audio?
Check the session matches your chat source. Refresh the Browser Source. Keep only one copy playing TTS.
For persistent chat, leave automatic shutdown and scene-activation refresh off initially. SSN overlay setup · TTS setup.
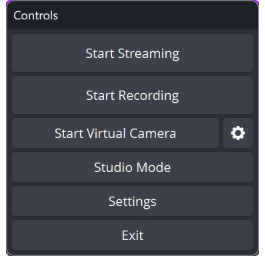
Record a minute. Then go live.
- Choose a recording folder in Settings → Output.
- Press Start Recording. Talk, play sound, and switch scenes.
- Stop and watch the file. Check volume, framing, and lip sync.
- Set your platform’s title and visibility, then Start Streaming. Check its preview and stream health; some platforms also require Go Live.
Start Streaming can make you publicly live. Use a private test where available. When finished, stop streaming and confirm the platform event has ended.
Recording format and separate audio tracks
MKV tolerates an interrupted recording. Use File → Remux Recordings for MP4 afterward. Current OBS also offers resilient Hybrid MP4/MOV.
For separate editing tracks, keep a full mix on track 1, then assign mic/game to additional tracks in Advanced Audio Properties and enable them under Recording.
If something looks wrong
Open View → Stats to identify the bottleneck.
Network drops
Lower bitrate; try wired Ethernet.
Rendering lag
Cap game FPS; simplify the scene.
Encoding lag
Use hardware encoding or lower output FPS.
Silent output
Check mute, monitoring mode, and audio track.